How to Create Custom Reports in Salesforce?
Salesforce has many good services and features which enable business users to easily get required insights. Custom reports in Salesforce are very much useful in the reporting processes for any business. Here is a guide to know how to create them.

What are Custom Reports in Salesforce?
Salesforce has some standard reports. Apart from that, it allows the users to create their own reports and these are referred to as custom reports. Based on the requirements, users can select the desired dimensions and metrics. With the easy ways of customization facilities and features, custom reports in Salesforce are helpful for various business segments and operations.
Things to do before creating custom reports
Before creating a custom report in Salesforce, it is necessary to check certain considerations. They include –
One should be careful about the custom report types, fields, and objects while creating a custom report. Otherwise, the related processing dashboards will show errors during the creation of custom reports in Salesforce.
Creation of Custom Reports in Salesforce
Now, let’s get started to know the creation of custom reports in Salesforce.
Step 1 – Definition of Custom Reports in Salesforce
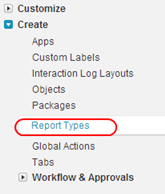
Firstly, you should define the custom reports in Salesforce. To do this, go to set up and then follow this path.
Set up à Create à Report types
Once you select the report types, you will get another option to select the New Custom Report Type. Then, you will get a new page. It shows various specifications including the report type template. You can define it as per your desires. You should enter certain mandatory considerations like description, report type label, primary object name, and report type name in the respective fields.
Remember that once the custom report type template is saved, one cannot change the name of the primary object. One should be careful while giving a report type label – it can include as many as 50 characters long and the description can be up to 255 characters long.
After filling all these things, click on the ‘Next’ button to proceed further.
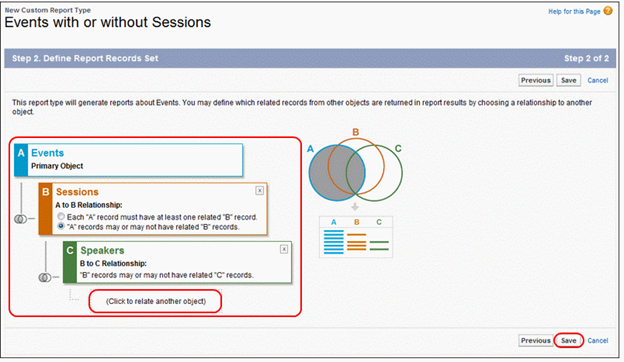
Step 2 – Definition of Reports Records Set
It is then important to define the reports records set. When running a custom report type, you can find an option for selecting object relationships Mention your desired Salesforce object relationship. With this, you can determine the field and objects to be displayed in the report.
Here is a simple example of defining a reports recordset. An object called ‘Event’ here is having relationships with speaker and sessions.
Once the objects are created, you should click on the ‘Save’ button.
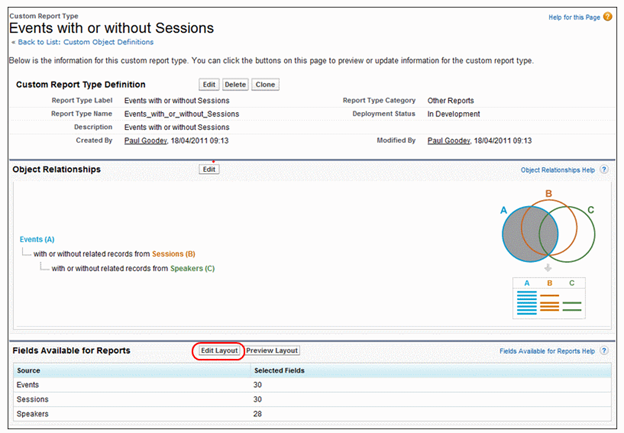
Step 3 – Layout Specification for Display of Custom Fields in Salesforce Custom Reports
Upon saving the above features, you will find a detailed view of the custom report. Now, in a custom report, we have a standard and custom fields that are displayed. To let which custom and standard fields should be there in a report, you have to edit and select the necessary options and then click the ‘Edit Layout’button.
You can select the object fields from the view – this is present at the right end of the window. You can also select the fields in your personalized orders.
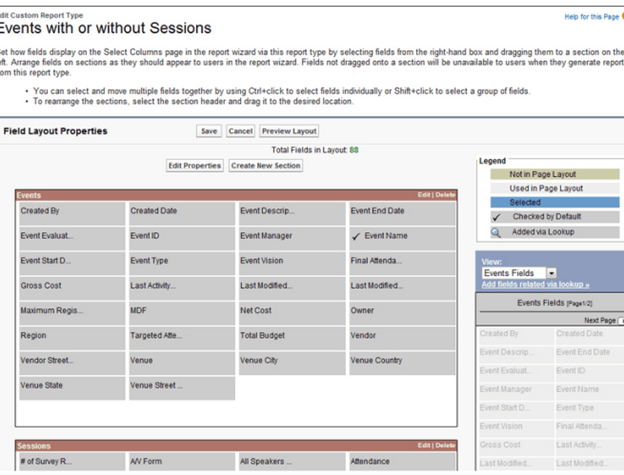
Each custom report type template can facilitate about 1000 fields in Salesforce. You can also Edit Properties to change the fields. Then, for ensuring checking, you need to click on the default checkbox and select the concerned name. Then click OK and then Save the customized settings.
Then go to the Report Tab and select a New Report. You will find a new screen.
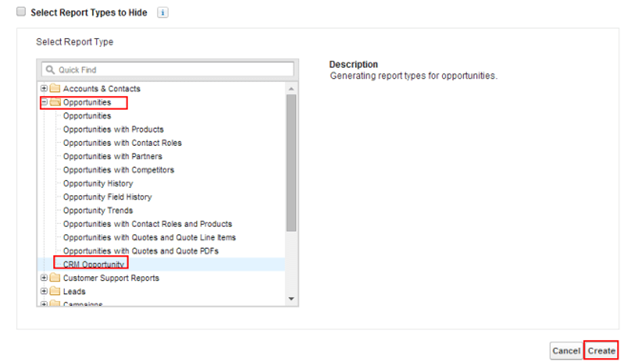
In this window, choose the desired report folder and a report for creating a customized report. There is a button called ‘Create’ – click on it. You will find another window as below.

There will be a panel on the left side showing different fields. Select the required fields and drop then on the Header.
Now, select the Format you want.
In order to display the fields, click on the ‘Show’ button.
Then, go to the option of the ‘Date Range’ and select ‘All’.
At last, for saving it, click the ‘Save’ button.

Then, enter the report name.
Now, give a report description.
Choose a suitable folder for saving the report.
Then, there is an option of Save and Run – click on it for running the new report.

Through any required field, choose the right summarized information.
Then run and save the report.
That’s it! You are done with the creation of a custom report in Salesforce.
It is quite simple to follow the above steps and create your own reports in any of your sales, marketing, customer support, or analytics teams. There is no need to have technical programming proficiency. I hope this detailed information is useful for your report making in Salesforce. All the best!
 +918686864286
